
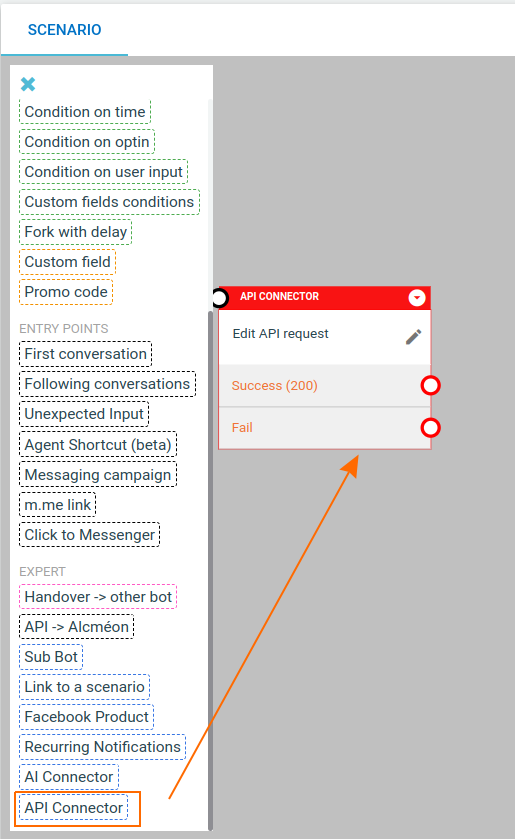
API Connector box
The API Connector box is a box available in all Alcmeon scenarios. The goal of this box is to do 2 main actions:
- an API call to an external service
- extract some information from the answer and save them in scenario variables
Configuring this box is quite easy. You need to specify which HTTP method you want to use (only GET and POST are supported so far) and the URL of your API endpoint.
If your API service requires an authorization token you can use one of the oAuth2 authorizations created (see chapter below) by selecting it in the External Authorization dropdown of the box.
If you selected a GET, no other info will be required for performing the API call.
If you selected a POST you can also add a body to your request. NB The body must be in JSON format, elsewhere the call will fail.
NB We automatically add 2 headers to this call:
- x-request-id: a unique identifier generated with UUID4
- x-client-id: the string 'alcmeon' (useful to identify the caller)
Timeout
After 25 seconds, if the API did not answered to the HTTP call, the API Connector box will exit through the "Fail" exit and the bot execution will continue.
How to use scenario variables in API Connector
You can use scenario variables previously set in this box. This will allow you to parameterize your request depending on user data you need.
Example: You want to get information about the order of the user your are interacting with. Your API has a GET method with url: http://my-api//<order_id> .
You need is to the order id of the user so that you can perform the call
- First, collect the order id of the user (by asking it to him for instance)
- Then save this value to a scenario variable order_id
- In your API Connector box, parameterize the url with the following syntax
https://my-api/{{order_id}}
You can use these variables in your API endpoint url or in the body of the POST request.
Bonus: in case you want to use the external id of the user, we provide a pre-filled variable: {{user_id}} to be used in the same way as above.
Handle API answers
In the API Response section of the box you can configure which data you want to extract from the response to use later in the scenario:
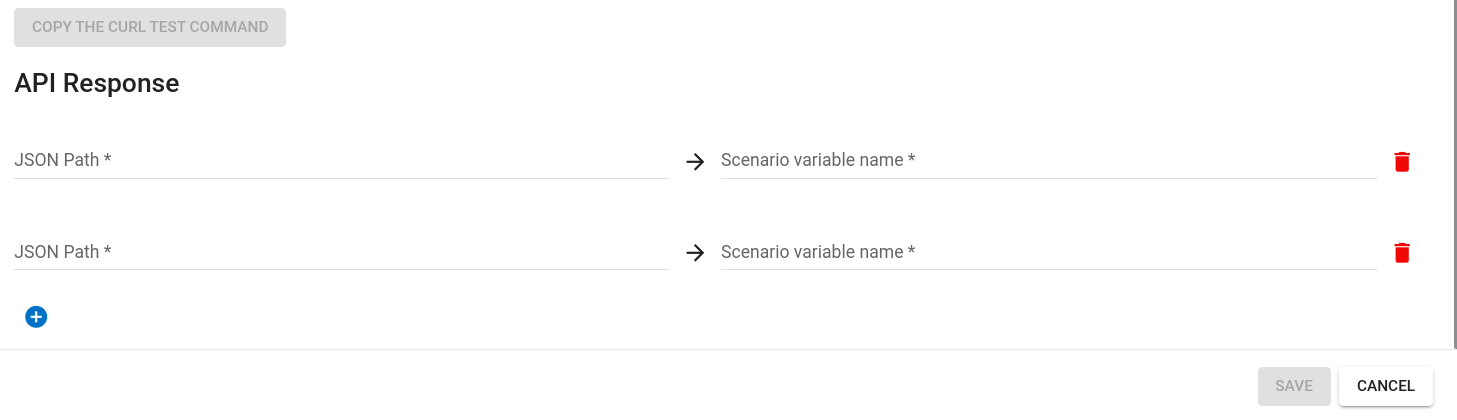
You will need to define the JSON path of the field you want to extract and choose the name of the variable to assign it to. If you are not familiar with the JSON paths parsing you can read the doc https://www.ionos.com/digitalguide/websites/web-development/python-jsonpath/
Payload structure for POST requests
When making a POST request, the payload must be a valid JSON object. This means that all variables, such as {USER_ID}, must be enclosed in double quotes to comply with JSON formatting requirements.
Example Payload
Below is an example of a payload with variables:
{
  "user": "{USER_ID}",
  "key": "value",
  "user_data": {
    "product_id": "{{another_variable}}"
  }
}
This implies that the values sent in the JSON to the API will always be strings.
In the example above:
- The user field contains a variable {{user_id}} intended to be replaced by an actual value.
- The user_data field contains another variable, {{another_variable}}, under the product_id key.
Once the placeholders are replaced with actual values, the resulting payload might look like this:
{
  "user": "12345678",
  "key": "value",
	"user_data": {
    "product_id": "ABC_0123"
  }
}
Allowed and Not Allowed Formats
The following table illustrates valid and invalid formats for JSON payloads:
| Not Allowed | Allowed |
|---|---|
| {"user": {{user_id}}} | {"user": "{{user_id}}"} |
| {"user": '{{user_id}}'} | {"user": "A sentence containing {{user_id}} variable and text"} |
| {{{variable}}: "variable as key without double quotes"} | {"{{variable}}": "variable as key with double quotes"} |
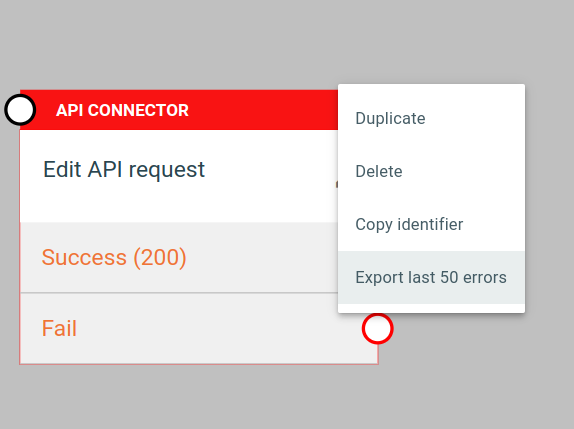
How to debug errors occurred during API Connector box calls
As the API Connector box performs HTTP calls we implemented a mechanism to retrieve errors occurred during these calls (e.g. HTTP status code different from 200, json path not found in result, ...) .
We provide 2 methods to get them:
- receive them by email
- export the list of last 50 errors from the box
1
To be able to receive errors you must add your address email to "Outgoing email" page. The first line in the box contains a link to this page:
 You will be notified for each FIRST daily error the box will trigger (only the first to avoid to spam you).
2
To export the list of last 50 errors you can simply click on the correspondent option in the box.
oAuth2 external authorizations
We allow clients to configure oAuth2 authorizations (with tokens associated) which can be used to perform API calls to an external server (for example in the API Connector box).
We allow different types of authorizations:
- Client credential (see https://oauth.net/2/grant-types/client-credentials/)
- Password (see https://oauth.net/2/grant-types/password/)
- Custom HTTP Headers
For the Client credential and Password mode, the token is fetched from the given URL and then stored according to the expires_in field. It will then be used in the API Connector box in the Authorization header as a Bearer token.
For example, if the token returned by the API is abcdef, the API call from the API connector box will send the following header:
Authorization: Bearer abcdef
Create a new oAuth2 authorization
From the Settings menu, open the page "External authorizations". This page will list all the created authorizations allowing to edit and delete them or create a new one.
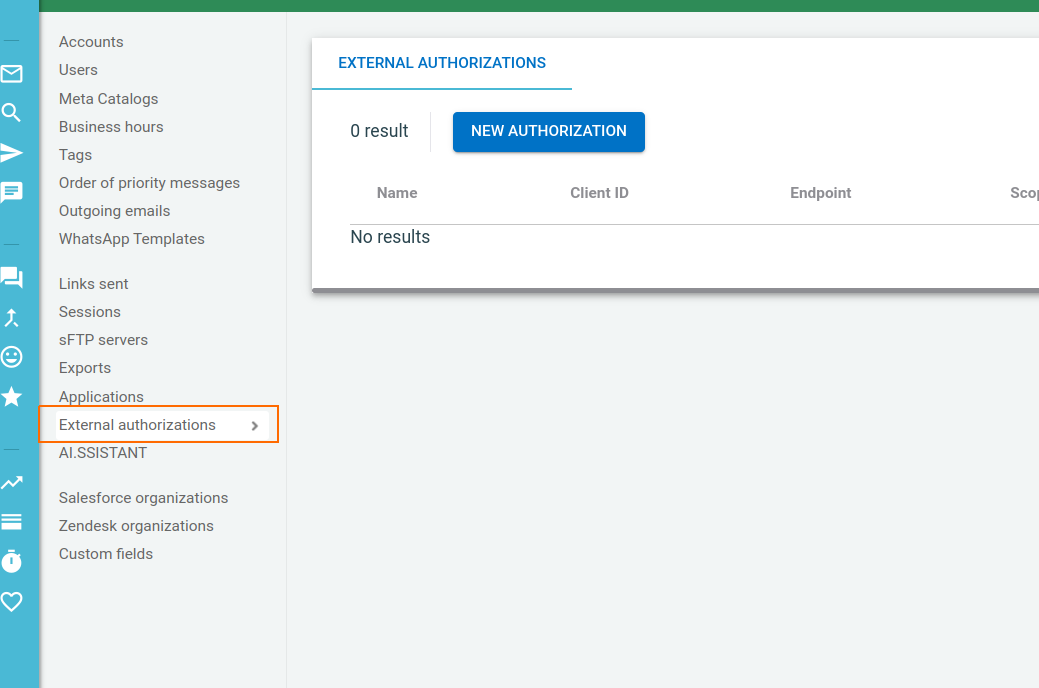
To create a new one, click on the New Authorization button: a new page will appear where you can configure your data:
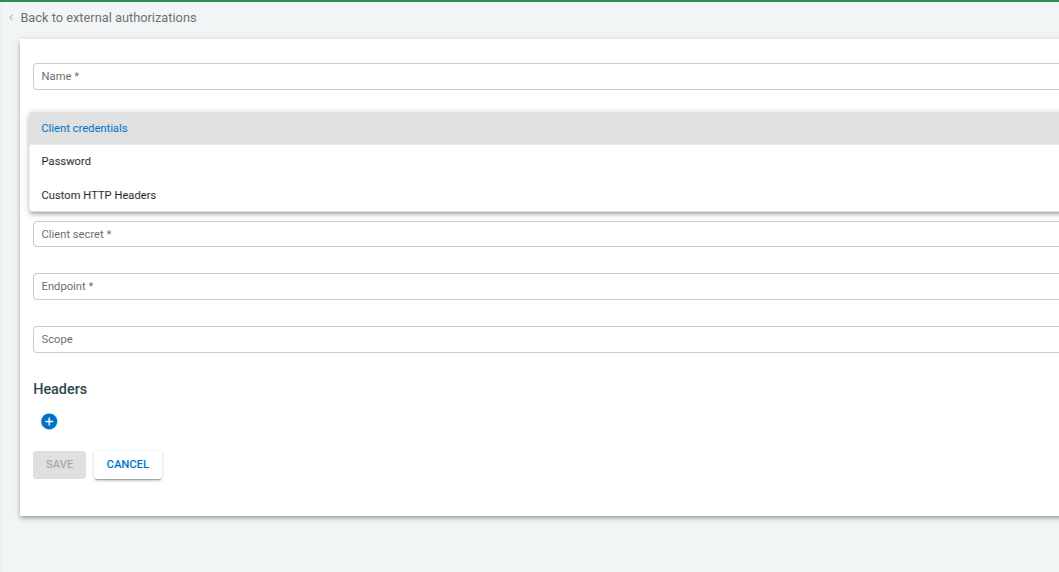
The fields in this page are required to perform the API call (POST) to the selected endpoint, which will allow to get a valid token to be used later.
When clicking on Save we will take care of performing the API call to get the token.
NB We automatically add 2 headers to this call:
- x-request-id: a unique identifier generated with UUID4
- x-client-id: the string 'alcmeon' (useful to identify the caller)
If everything went well, you will be redirected to the authorizations list page where you will see the item just created and your token will be available to be used when necessary. If something went wrong the error will be prompted in the GUI and you will be able to modify your fields data.
An example of returned value for the above API call could be:
{
  "access_token": <your access token>,
  "expires_in": <the token validity delay in seconds>
}
For this type of oAuth2 authorization (i.e. client credentials) when a token is expired we'll take care of requesting a new one.
Overwriting the default Bearer token
As written in the oAuth2 external authorizations section, the retrieved token is used as a bearer token. The header will look like this:
Authorization: Bearer abcdef
If your API does not support the Bearer token or if you prefer to retrieve this token in a custom header it is possible in the API Connector. Open the box to edit the content and add the header key that you want for your token. Then as a value, use {{token}}. This will be replaced dynamically just before the API call with the token.
Note: If you use a custom header to send the token, the Authorization header will not be sent.
Example:

Headers sent for the API call:
{
  ...
  x-header-test: "abcdef",
  ...
}
Updated 10 months ago