Configuration in Alcméon
How to configure your Alcméon environment
OverviewThis section covers the following settings:
- how to link a social media account to a Salesforce organization;
- how to configure the synchronization of conversations between your Alcméon environment and your Salesforce organization, depending on your Customer Support Agents workflow;
- (optionally) which fields are used to search in Salesforce for a Contact matching a social media user in Alcméon;
- (optionally) which fields are used to display a Salesforce Contact linked to an Alcméon user in his profile;
- (optionally) how to set specific dimensions to the Alcméon Conversation widget to customize its appearance in Salesforce.
PrerequisitesThe Alcméon for Salesforce package has been installed in your Salesforce organization and the organization has been authorized in Alcméon.
👤 Compatible role
Alcméon administrator
Estimated reading time: 10 minutes
In the following, we will use the word Contact as a reference to either a Salesforce Contact object or an Account object if the PersonAccount mode is enabled, depending on the actual configuration of your Salesforce organization.
Link a social media account
In Alcméon, go to the settings menu and click on Salesforce organizations.
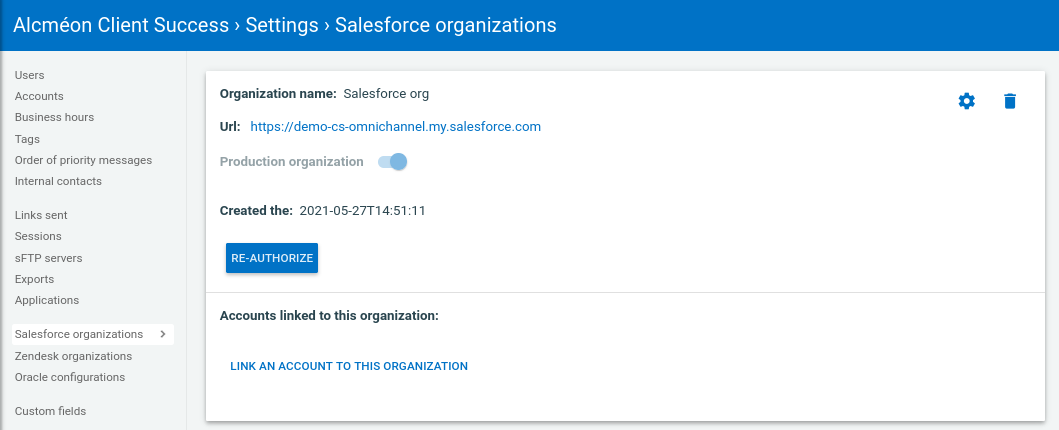
To enable the synchronization of conversations for a given social media account, you need first to link this account to this organization:
- Click on
Link an account to this organization. - In the pop-up, select the site and click on
OK. - Click on the switch in front of the site name in order to enable the connection and click on
OK.
For instance:
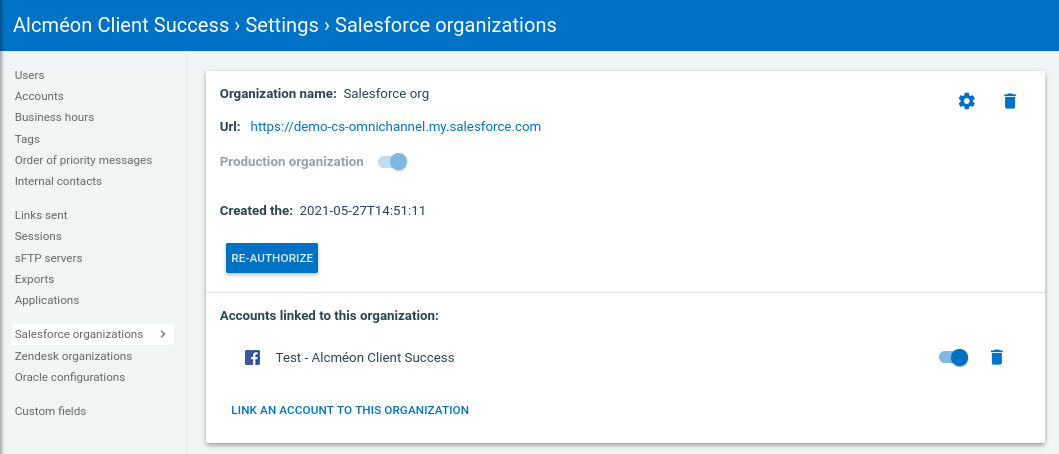
DisclaimerThe same social media account should not be linked to several Salesforce organizations. We recommend to create a test account per test organisation.
Conversations synchronization
Frequency
UsageThis parameter determines how often Alcméon will push conversations to your Salesforce organization, affecting the number of API calls to create or update
alcmeon__Conversation__ccustom objects. Currently, only real-time synchronization is supported, and the batched option is deprecated.
- Go to the
Salesforce organizationsmenu. - Click the
Edit configurationbutton at the top right corner of the organization. - Ensure the first tab is filled in as per the previous steps.
- Navigate to the
Conversations synchronizationtab:

Triggers
UsageThis section is about defining when a conversation is eligible to be pushed to your Salesforce organization, i.e. the conditions required in Alcméon to create or update an
alcmeon__Conversation__cobject in Salesforce.
To configure a workflow in which Customer Support Agents will process messages and answer from the Alcméon interface, go to the Conversations synchronization tab of your Salesforce organization configuration.
This step is directly related to your Customer Support Agents workflow. Feel free to jump directly to the right workflow for you.
All agents or a part of them are replying from Alcméon
Compatible workflows 💬
all-agents-reply-from-alcmeon,agents-reply-from-alcmeon-and-salesforce
-
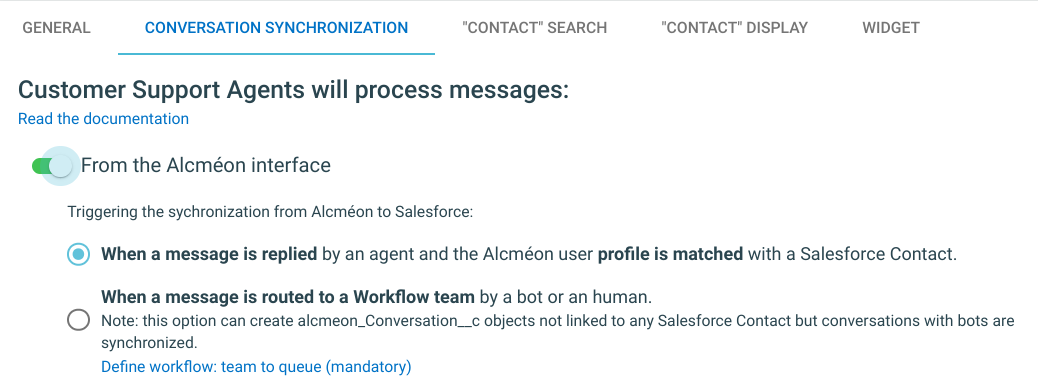
In the
Customer Support Agents will process messagessection, activate the first switch named From the Alcméon interface. -
Based on your requirements, choose the right option to define when social media conversations should be pushed to Salesforce:
When a message is replied by an agent and the Alcméon user profile is matched with a Salesforce Contactif you need to enable the 360 view on the customers profiles.When a message is routed to a Workflow team by a bot or an humanif you need all conversations (including bot-only ones) to be available in your Salesforce organization.
For instance:
All agents or a part of them are replying from Salesforce
Compatible workflows 💬
all-agents-reply-from-salesforce,agents-reply-from-alcmeon-and-salesforce
- In the
Customer Support Agents will process messagessection, activate the second switch named From the Salesforce interface, via the Alcméon widget:

In this workflow, Customer Support Agents in Salesforce will reply to social media conversations via the Alcméon Conversation widget. The only possible trigger to push conversations to Salesforce is When a message is routed to a Workflow team by a bot or an human.
Team-based routing
UsageThis step is mandatory if you selected the team-based routing option (
when a message is routed to a Workflow team by a bot or an agent):
- you must define a mapping between an Alcméon team and a Salesforce queue. Thus, when a message will be assigned to this team in Alcméon, the conversation will be pushed to Salesforce. The
alcmeon__To_SF_Queue_Id__cfield of the correspondingalcmeon__Conversation__cobject will be set to the Id of this queue.- if relevant to your workflow, you can also decide to transfer your Salesforce conversations back to Alcméon for further processing. This works by defining the reverse mapping between a Salesforce queue and an Alcméon team. Thus, when the
alcmeon__From_SF_Queue_Id__cfield of analcmeon__Conversation__cobject is set to the Id of this queue, the conversation is assigned to this team in Alcméon.
From Alcméon to Salesforce
First, you need to create the team(s) that will be used to route to your Salesforce organization. If the team is already existing, just click on the Define workflow: team to queue (mandatory) link and skip the team creation step.
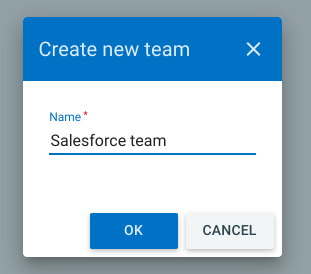
In this tutorial, we'll create one team named Salesforce team for this purpose:
- In the
Settings, go to theUsersmenu. - From the
Teamstab, click onCreate a new teamand name itSalesforce team:
You need now to configure the team routing by associating the Salesforce team to an existing Salesforce queue:
- Go back to the
Conversations synchronizationtab of your Salesforce organization configuration. - In the
Workflow: Alcméon team to Salesforce queuerouting section, you can configure a mapping between a team and a Salesforce queue:- click on the
+icon; - select the
Salesforce teamin the drop-down list on the left; - then the
Alcméon queue(created previously in the Configuration of your Salesforce organization section) in the drop-down list on the right:
- click on the

If you need to add more team-to-queue mappings, just reiterate this process.
Click on Save.
From Salesforce to Alcméon
Compatible workflows 💬
all-agents-reply-from-salesforce,agents-reply-from-alcmeon-and-salesforce
In this workflow, when the alcmeon__From_SF_Queue_Id__c field of an alcmeon_Conversation__c object is set to a specific Salesforce queue Id, the connector automatically routes the last message of the conversation to the Alcméon team associated to this queue.
In this tutorial, we'll create one team named Alcméon team for this purpose, but you can use an already existing one:
- In the
Settings, go to theUsersmenu. - From the
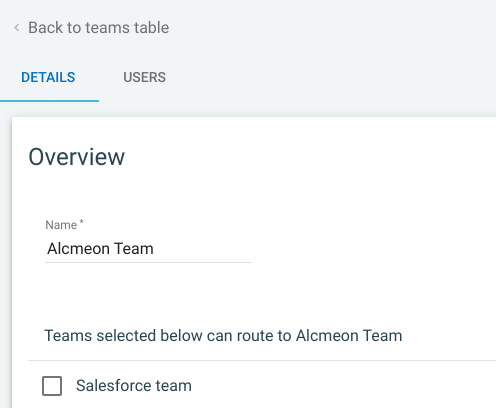
Teamstab, click onCreate a new teamand name itAlcméon team. - Make sure untick the
Salesforce teamcheckbox in the sectionTeams selected below can route to Alcméon team, for instance:
You can now configure the team routing by associating the Alcméon team to an existing Salesforce queue:
- Go to the
Conversations synchronizationtab of your Salesforce organization configuration. - In the
Workflow: Salesforce queue to Alcméon teamrouting section, configure a mapping between a queue and a team:- click on the
+icon; - select the
Transfer to Alcméonqueue (created previously in the Configuration of your Salesforce organization section) in the drop-down list on the left; - then
Alcméon teamin the drop-down list on the right:
- click on the

If you need to add more queue-to-teams mappings, just reiterate this process.
Click on Save.
Salesforce Contacts information
Compatible workflows 💬
all-agents-reply-from-alcméon,agents-reply-from-alcmeon-and-salesforce
Contacts search
UsageA Customer Support agent who is processing a conversation in Alcméon will look for a Salesforce Contact matching the social media user. The search results are displayed in Alcméon and the agent can link the Alcméon user profile directly from a result by clicking on the “bind” icon on the right of the result, or choose to create a new Contact.
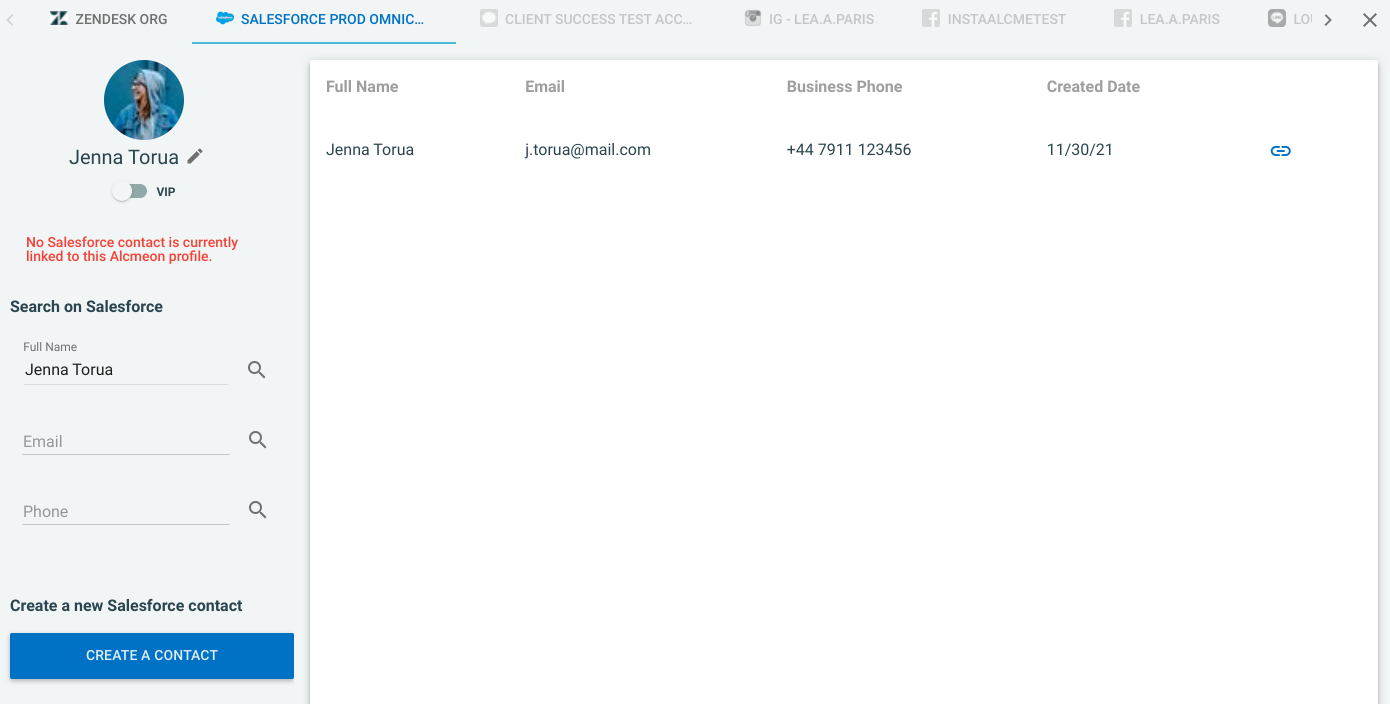
From the Salesforce organizationsmenu, click on the Edit configuration button on the top right corner of the organization.
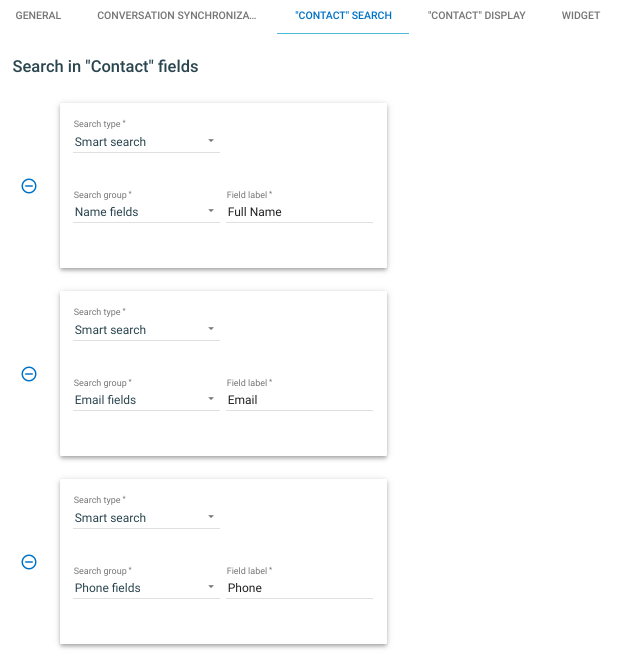
To change the Contact fields provided per default for the search, go to the third tab named "Contact" search (or "PersonAccount" search if the PersonAccount mode is enabled) of the Salesforce organization configuration and select:
- the set of Salesforce Contact fields which can be used by Customer Support agents to look for a Contact in Salesforce to match the social media user in Alcméon, for instance:
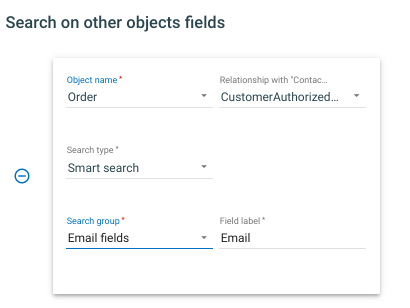
- it is also possible to define additional fields to search on other Salesforce objects that have a relationship with the Contact object, for instance:
- the set of Salesforce Contact fields which will be used to display the search results in Alcméon, i.e. the columns for the Contacts found, for instance:
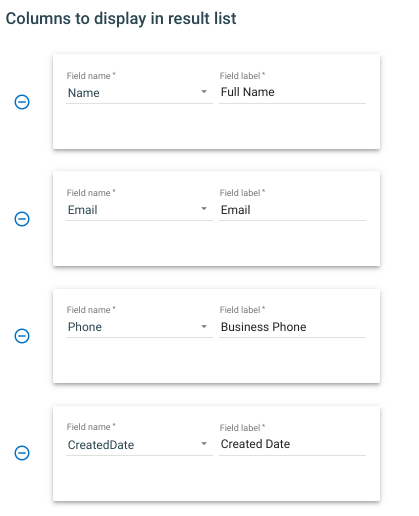
Click on Save.
Contact display in user profile
UsageOnce a Customer Support agent has linked an Alcméon user to a Salesforce Contact, the user profile contains additional information in the organization tab to provide a 360 view to the agent:
- a configurable view of the Salesforce Contact in the left panel;
- a list of the Contact interactions in the right panel (e.g. call, emails, etc.).
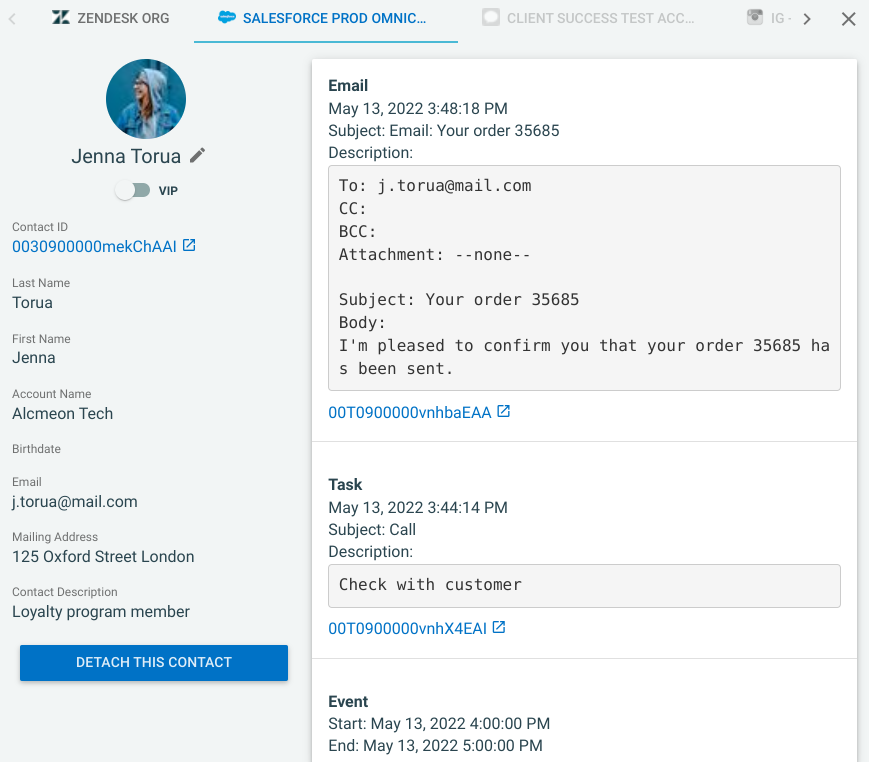
To change the default Contact view in the user profile, go to the fourth tab named "Contact" display (or "PersonAccount" display if the PersonAccount mode is enabled) of the Salesforce organization configuration and select the Salesforce Contact fields which will be used to display the Contact linked to the Alcméon user in the left panel of his/her profile, for instance:
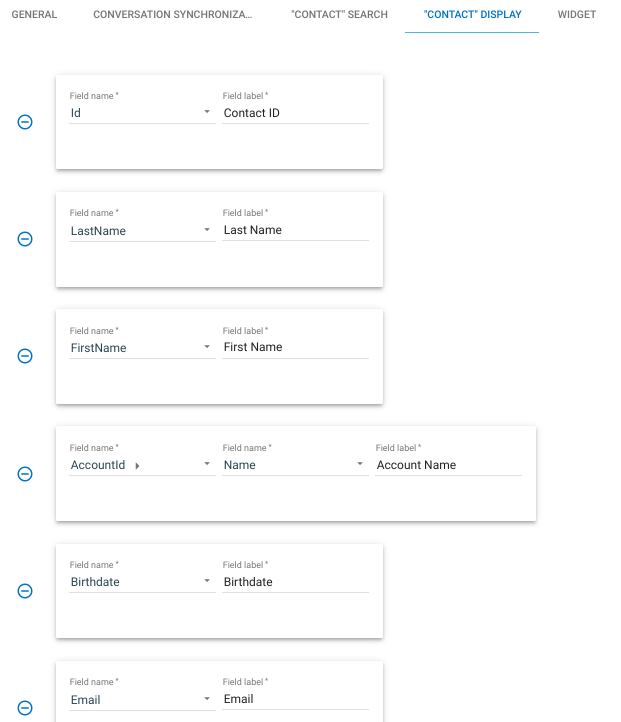
Click on Save.
Conversation widget appearance in Salesforce
UsageThe Alcméon Conversation widget is packaged with a default height and width (
680pxx420px). You may want to change them to better fit yourCasespecific layout, for instance to make it take the full width of a column.
Compatible workflows 💬
all-agents-reply-from-salesforce,agents-reply-from-alcmeon-and-salesforceif you are usingCaseobjects on top ofalcmeon__Conversation__ccustom objects and the widget is added to the Case Record Page.
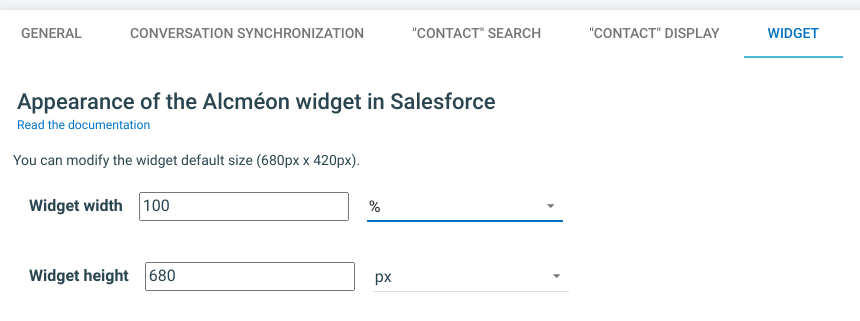
You can change the width and/or the height of the widget directly in the Widget tab of your Salesforce organization configuration in Alcméon:
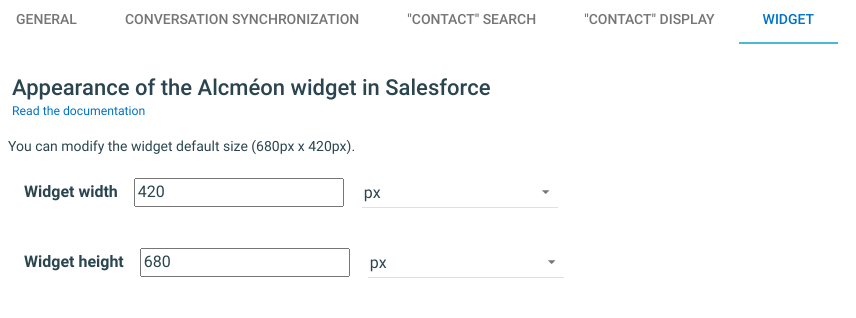
Enter the wished value (only numbers) and choose the unit between px (pixels) or %, for instance set the width to 100% to take the full width of a column:
Click on Save.
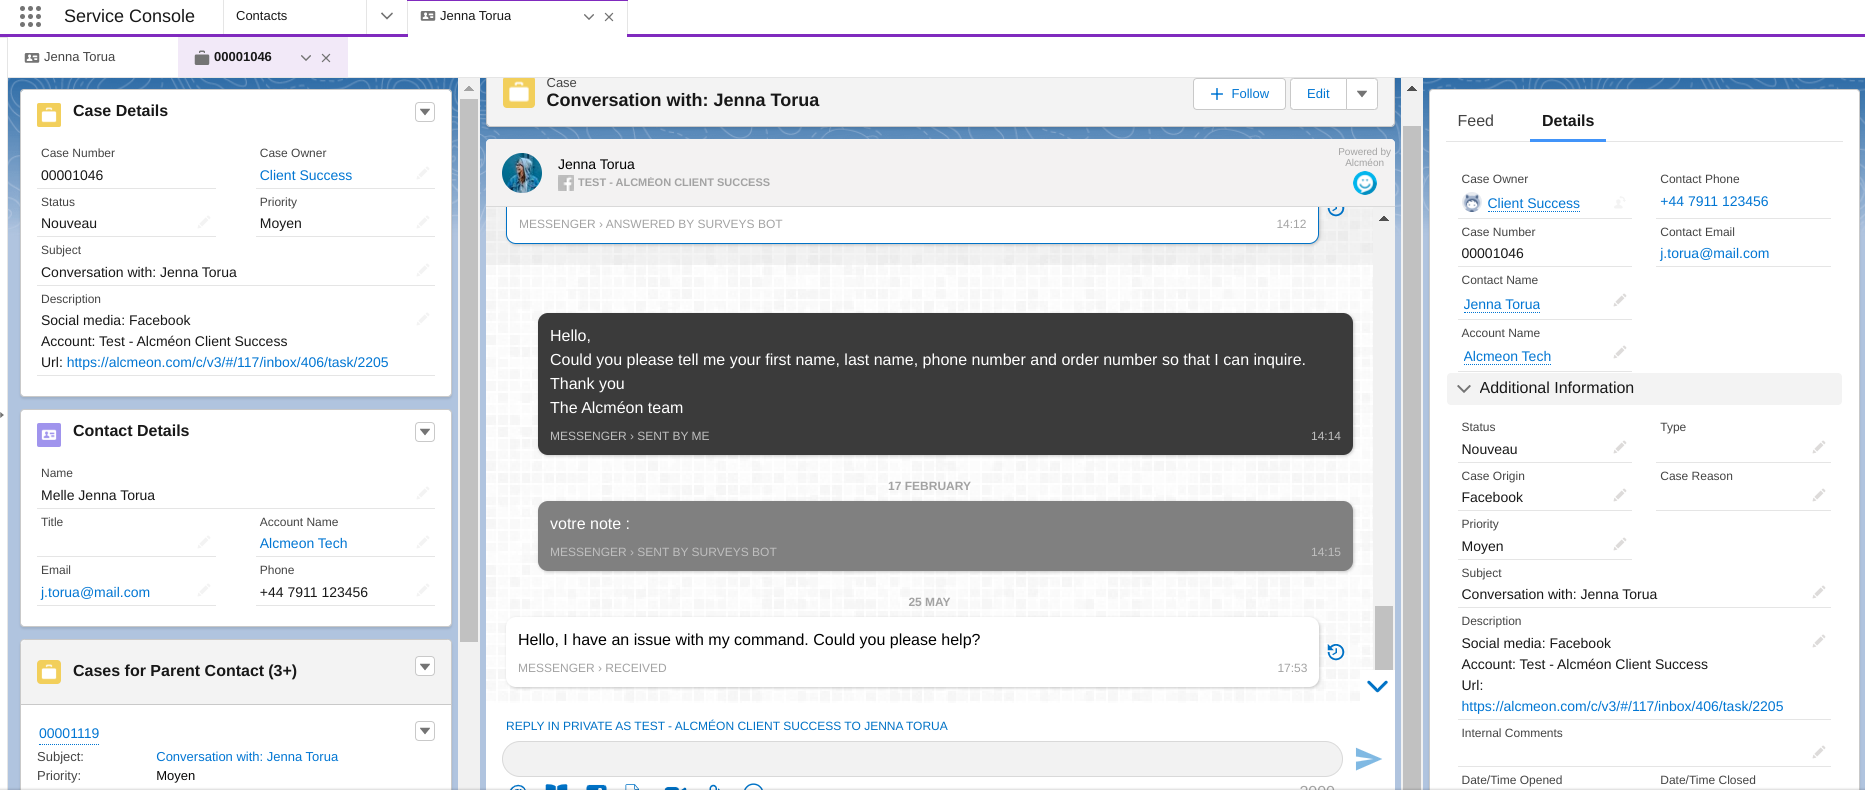
Check that the widget is displayed accordingly in the Case layout of your Salesforce organization, for instance:
Updated 5 months ago