Configuration of your Salesforce organization
OverviewThis section covers the following topics:
- How to create the
Queuesrequired to transfer the conversations to your Salesforce organization if you are using team-based routing in Alcméon.- How to configure the connector if you plan to work with
Caseobjects.- (Optionally) How to integrate with Salesforce
Omni-Channelto route conversations to Customer Support Agents.- How to configure the
Contact(orPerson Accountif enabled) layout to display the related conversations.- (Optionally) How to setup Engagement.
To ease your navigation, we mentioned for each step the compatible Customer Support Agents workflow(s) (as defined in the Working with your Salesforce organization page) with the 💬 icon.
⚠️ Required Refresh Token Policy SettingWhen configuring the Connected App in Salesforce for the Alcméon integration, make sure the “Refresh Token Policy” is set to:
Refresh token is valid until revoked
This is the only supported setting compatible with our authentication and token renewal system. Other settings are not supported and may cause the integration to stop working due to token renewal failures.
👤 Compatible role
Salesforce administrator
Estimated reading time: 15 minutes
Queues
Compatible workflows 💬
All workflows using team-based routing in Alcméon to transfer conversations to your Salesforce organization.
UsageQueues can be mapped to Alcméon teams to transfer social media conversations between your Alcméon environment and your Salesforce organization.
AssumptionIn the following, we will assume that Customer Support Agents are working on
Caseobjects in Salesforce. Therefore, we will useCaseas the object to transfer. If you are working directly withalcmeon__Conversation__cobjects, you can replaceCasebyalcmeon__Conversation__c.
Add a routing configuration
- In the
Quick Findmenu, search forRouting Configurationsand open the page. - Click on
New. - Fill the form with the following values:
- Routing Configuration Name:
Alcmeon routing - Developer Name:
Alcmeon_routing - Routing Priority:
1 - Routing Model:
Least Active - Units of Capacity:
1
- Routing Configuration Name:
- Click on
Save.
Create Queues
You need to create the queue to transfer conversations from Alcméon to Salesforce:
- In the "Quick Find" field, search for
Queuesand open the page. - Click on
New. - Fill the form with the following values:
- Label:
Alcmeon queue - Queue Name:
Alcmeon_queue - Routing Configuration: click on the search icon and select
Alcmeon_routing - In the
Supported Objectssection, transferCasefromAvailable ObjectstoSelected Objects - In the
Queue Memberssection, transfer the all the available members toSelected Members
- Label:
- Click on
Save.
If you need to transfer conversations from Salesforce to Alcméon (that may be the case if you are implementing a Customer Support Agent workflow of type agents-reply-from-alcmeon-and-salesforce), you'll need to create another Queue:
- Click on
Newagain. - Fill the form with the following values:
- Label:
Transfer to Alcmeon - Queue Name:
Transfer_to_Alcmeon - In the
Supported Objectssection, transferCasefromAvailable ObjectstoSelected Objects
- Label:
- Click on
Save.
Working with Cases
Compatible workflows 💬
All workflows if you are using
Caseobjects on top ofalcmeon__Conversation__ccustom objects.
Create Apex triggers
UsageWorking with
Caseobjects implies to create aCasefor eachalcmeon__Conversation__ctransferred to your Salesforce organization. Apex triggers will be used to keep thealcmeon__Conversation__candCaseobjects synchronized throughout the conversation life cycle.
DisclaimerDemo Apex triggers are available in our Salesforce demo public repository. There are provided as examples and we will not provide technical support on it. You are responsible to implement it according to your business requirements.
First, let’s implement a trigger in charge of creating a Case when an alcmeon__Conversation__c object is created. It should also link them together by setting the alcmeon__Case__c field of the alcmeon__Conversation__c to the Id of the new Case. This is particularly important if you are using our Alcméon Conversation widget. When the Contact (or Person Account) associated to the conversation or its owner changes, the Caseshould also be updated for instance.
- Click the
Settingsicon on top right corner, and then click onDeveloper Console. - Click on
File>New>Apex Trigger. - Set
SyncCaseWithAlcmeonConversationfor the name andalcmeon__Conversation__cfor sObject. - Replace the code with content of the SyncCaseWithAlcmeonConversation demo trigger.
- Save the file.
Now, let’s implement another trigger in charge of updating the alcmeon__Conversation__c object whenever the user manually update a Case to change its Contact (or Person Account) or assign it to the Queue mapped to the transfer to Alcméon team.
- Still in the Developer Console, click on
File>New>Apex Trigger. - Set
SyncAlcmeonConversationWithCasefor the name andCasefor sObject. - Replace the code with content of the SyncAlcmeonConversationWithCase demo trigger.
- Modify the trigger logic to fit your business requirements.
- Save the file.
Enable the Closed status
Closed statusYou may want to enable the Closed status of Case objects in order to simulate a realistic Customer Support Agent scenario:
- In the
Quick Findsection, search forSupport Settingsand open the page. - Click on
Edit. - Select the default user for the first two fields.
- Enable
Show Closed Statuses in Case Status Fieldcheckbox. - Click on
Save.
Notify agents of new messages
Our demo package contains an example of Aura component to notify Customer Support Agents when a new message is received for a conversation of a Case other than the opened one:
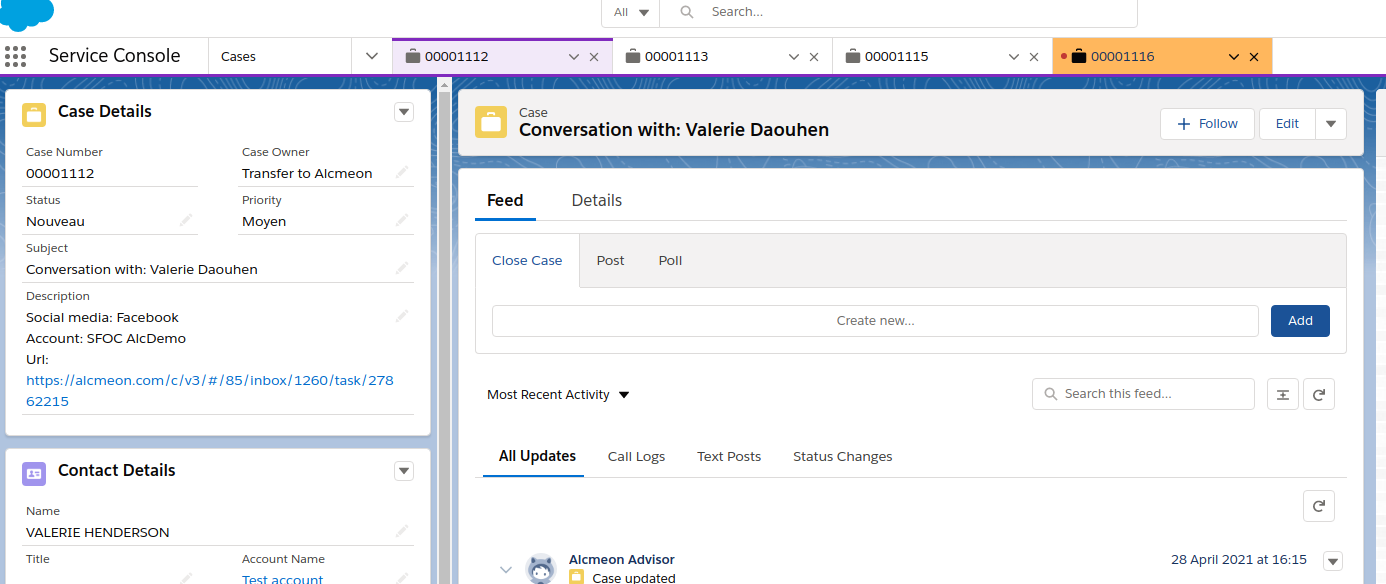
If you want to give it a try, please check the instructions.
Integrate with Omni-Channel routing
Compatible workflows 💬
all-agents-reply-from-salesforce,agents-reply-from-alcmeon-and-salesforceusing team-based routing in Alcméon to transfer conversations to your Salesforce organization.
UsageThe Alcméon for Salesforce connector is compatible with Salesforce Omni-Channel routing. You can therefore configure it to route the conversations to your Customer Support Agents when available.
DisclaimerThe Alcméon for Salesforce package creates only
alcmeon__Conversation__ccustom objects, which are compatible with the default queue based routing of the Salesforce Omni-Channel, as well as with any external routing model. It is the responsibility of the external routing engine to detect the creation ofalcmeon__Conversation__cobjects and decide what policy to apply to them.
Enable the Omni-Channel feature
- Click on the
Setupicon on top right corner, and then click onSetup. - In the
Quick Findmenu, search forOmni-Channel Settingand open the page. - Click on the
Enable Omni-Channeland save.
Create a service channel for Case routing
- In the
Quick Findsection, search forService Channelsand open the page. - Click on
New. - Fill the form with the following values:
- Service Channel Name:
Alcmeon Case channel - Developer Name:
Alcmeon_Case_channel - Salesforce Object:
Case
- Service Channel Name:
- Click on
Save.
Create a presence status for the Omni-channel window
- In the
Quick Findsection, search forPresence Statusesand open the page. - Click on
New. - Fill the form with the following values:
- Status Name:
Available - Case - Developer Name:
Available_Case - Status Options:
Online - In
Service Channelssection, transferAlcmeon Case channelfromAvailable ChannelstoSelected Channels.
- Status Name:
- Click on
Save.
Make this new presence status available to your target user profile::
- In the
Quick Findsection, search forProfilesand open the page. - Click on your target user profile.
- Click on
Service Presence Statuses Access. - Click on
Edit. - Transfer
Available - CasefromAvailableto theEnabled Service Presence Statusessection. - Click on
Save.
Configure your user
Make sure your target user is a Service Cloud User so that he can use Omni-channel in the Service Console:
- In the
Quick Findsection, search forUsersand open the page. - Click on the target user.
- Click on
Edit. - Enable
Service Cloud Usercheckbox. - Click on
Save.
Display the related conversations of a Contact
Compatible workflows 💬
all-agents-reply-from-salesforce,agents-reply-from-alcmeon-and-salesforce
UsageIf you plan to work without
Caseobjects, you may want to display the list of related conversations (i.e. thealcmeon__Conversation__cobjects) attached to aContact(orPerson Accountif enabled) to ease the navigation for your agents. NB: if thePerson Accountmode is enabled in your organization, you have to modify thePerson Accountlayout instead of theContactone.
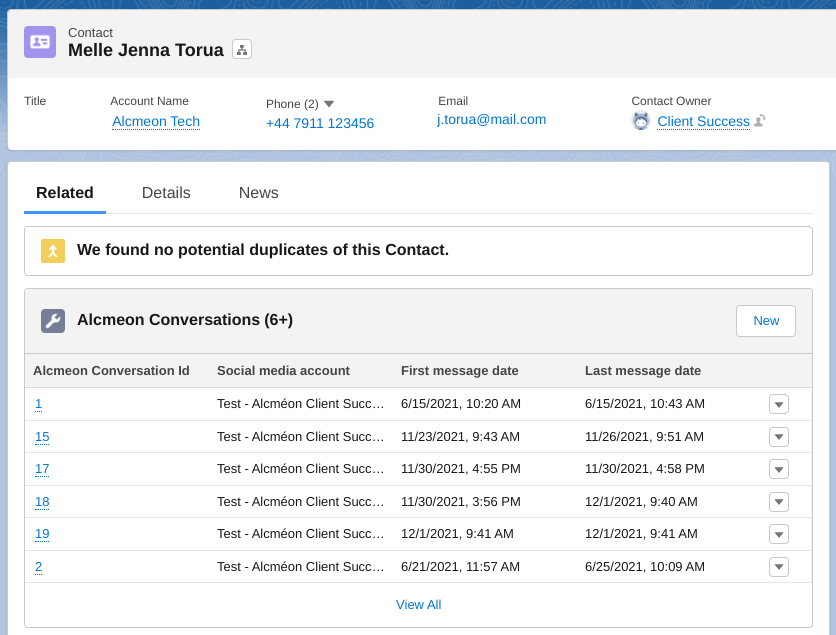
From a Contact (or Person Account) page, click on the parameters icon on the top right:
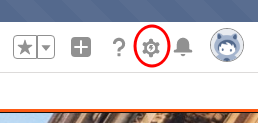
Then click on Edit Object and go to the Page Layouts section:
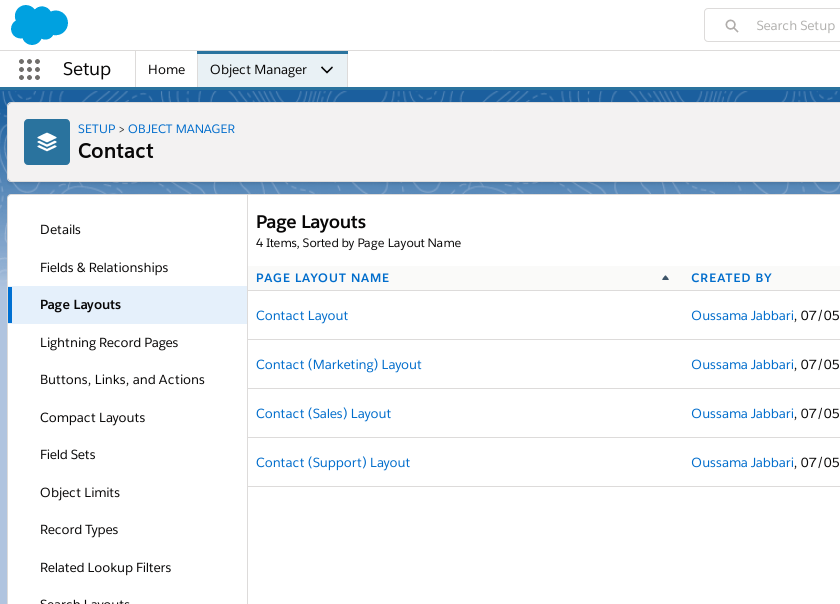
Choose the layout you want to change, then go to the the Related lists section. You just have to drag-and-drop the Alcmeon Conversations element to the Related Lists:
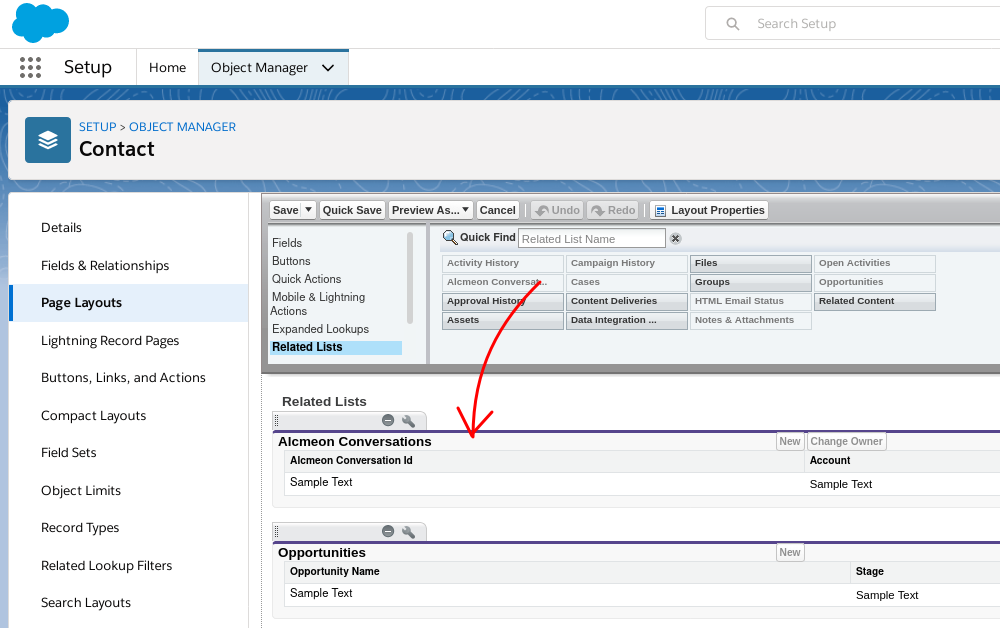
NB: if the
Person Accountmode is enabled in your organization, you will see twoAlcmeon Conversationselements in the list. In this case, you will have to select the second one.
Click on properties icon to choose which fields of the custom object you want to be displayed as column in this layout. For instance:
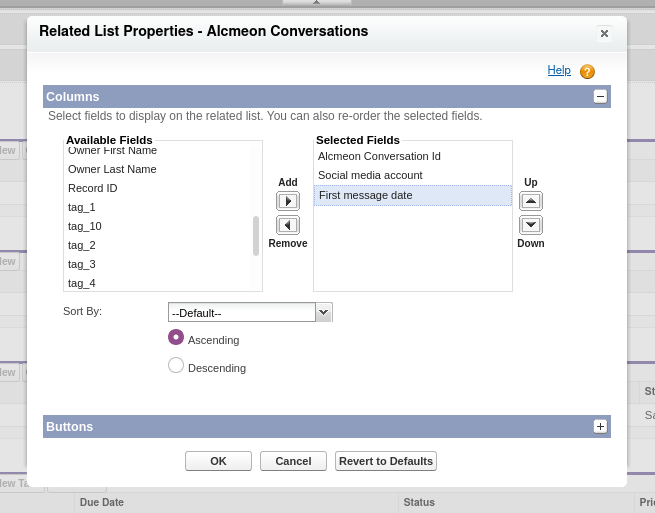
Click on OK then Save.
Configure Alcmeon Conversation widget
Compatible workflows 💬
all-agents-reply-from-salesforce,agents-reply-from-alcmeon-and-salesforce
UsageThe Alcméon for Salesforce package provides a Lightning component that can be used to display and answer conversations stored as
alcmeon__Conversation__c. It can be used directly from the packaged Lightning Alcméon Conversation Record Page or next to a Case or even in the console utility toolbar for instance, provided that a conversation is opened in the main window.
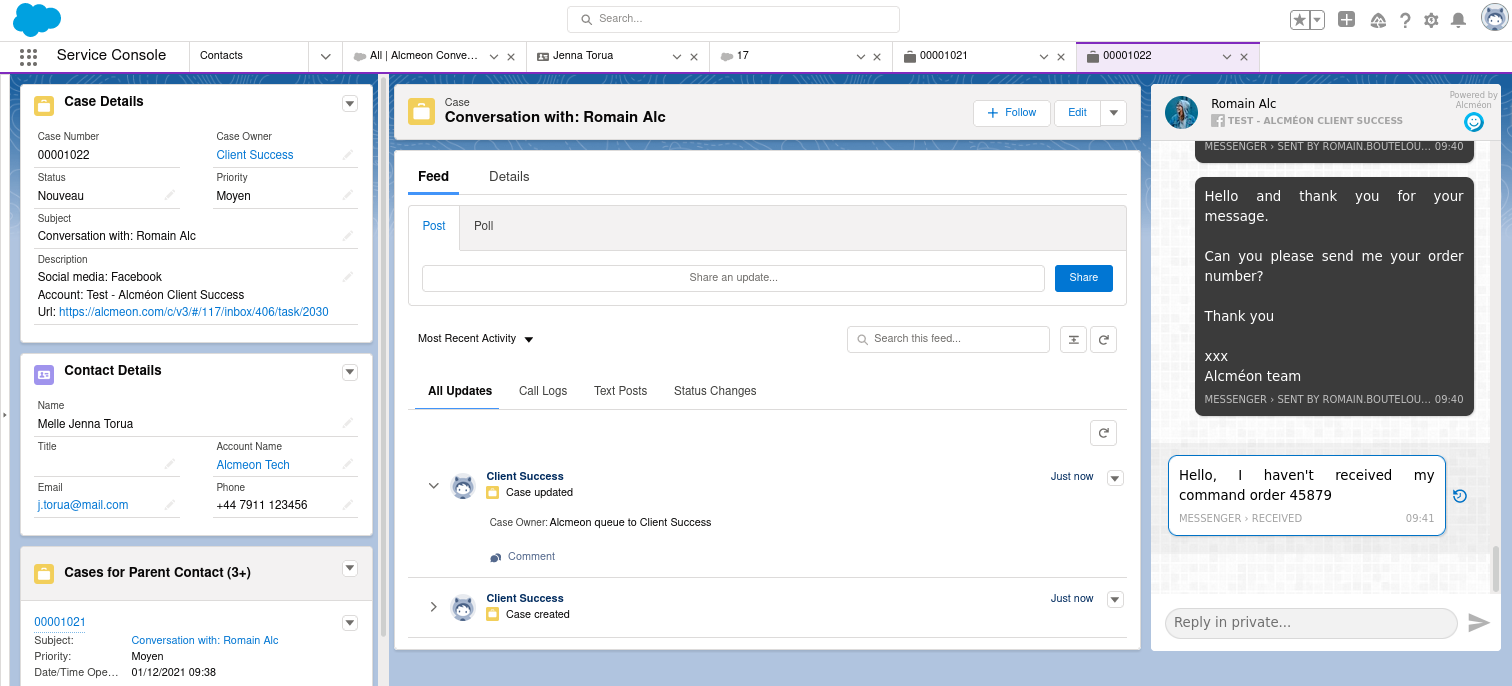
PrerequisitesThe Remote site settings of your Salesforce configuration has been configured.
Widget access
We first need to configure who can access the widget:
- In the
Quick Findsection, search for “App Manager” and open the page. - At the end of the Alcméon app line, click on the arrow and click on
Manage. - Click on
Edit Policies. - In the Permitted Users field, select
Admin approved users are pre-authorized. Click OK on the pop-up message that appears. - Click
Save.
Then we define who can see the canvas app. This can be done using profiles and permission sets:
- Back to the Alcméon Connected App Detail page, in the Profiles related list, click on the
Manage Profilesbutton. - Select the profiles that you want to give permissions to and click Save.
Add the widget to the Case Record Page
To add the Alcméon Conversation widget to the Case Record Page:
- Click on the
Object Managertab on top of the Setup page:

- Click on
Case. - Click on
Lightning Record Pages. - Click on
New. - On the pop-up window, click on the
Record Pagemenu. - Set Label to
Case Record Page. - Set Object to
Case. - Click on
Next. - Click on the
Clone Salesforce Default Pagetab. - Click on
Case Record View For Lightning Console. - Click on
Finish. - Let’s remove the
Relatedsection on the right panel: hover with your mouse over the right card and click on the bin delete button. - Drag the
AlcWidgetOnCasefrom the leftCustom - Managedcomponents list:
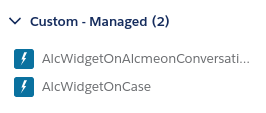
- And drop it to the empty panel on the right with
Add Component(s) Here. - Click on
Save. - On the pop-up window, click on
Activate. - Click on the
App Defaulttab. - Click on the
Assign as App Defaultbutton. - Check
Service Console. - Click on
Next. - Select
Desktopfor the form factor. - Click on
Next. - Click on
Save. - Click on the back arrow on the top left corner.
Setup Engagement
Compatible workflows 💬
all-agents-reply-from-salesforce,agents-reply-from-alcmeon-and-salesforce
Create Engagement objects
To allow an agent to send an engagement message to the customer from Salesforce, you must create an alcmeon__Engagement__c object linked to a Case with a Conversation widget. You can create it manually in Salesforce, or via a specific integration process to be implemented.
When creating an alcmeon__Engagement__c record, ensure you:
- Specify the sender and recipient IDs (who is sending the message and to whom), as per specification:
alcmeon__Sender_Id__candalcmeon__Recipient_Id__c. - Link the newly created engagement object to the
Caseby filling itsalcmeon__Case__cfield with the Case ID.
Enable Widget Automatic Mode Switching
To ensure the widget seamlessly switches from Engagement mode to Conversation mode when an engagement message is answered, extend your alcmeon__Conversation__c trigger to update the alcmeon__Conversation__c field of the related alcmeon__Engagement__c object with the ID of the newly received Conversation.
Note: The association between the received
alcmeon__Conversation__cand theCaselinked to thealcmeon__Engagement__cobject must still be handled as outlined in the Apex triggers section.
Updated 5 months ago